Configure Tailscale on pfSense
Intro
As mentioned in my previous post, there are a few things I want to solve compared to my existing VPN. I don’t want my traffic to exit on some random IP address in another country, and I want access to all my devices at home when I’m out of the house. And ya know… it’d be nice if it was all free too.
Goals:
- Create an encrypted tunnel back to my house to secure my traffic while I’m using public guest networks
- Get access to all the devices I have at home
To solve this, I’ll be using Tailscale which lets you build a VPN overlay across LANs and WANs automatically and with very little configuration. The way this works in the background is very cool but out of the scope of this post.
Create a Tailscale Account
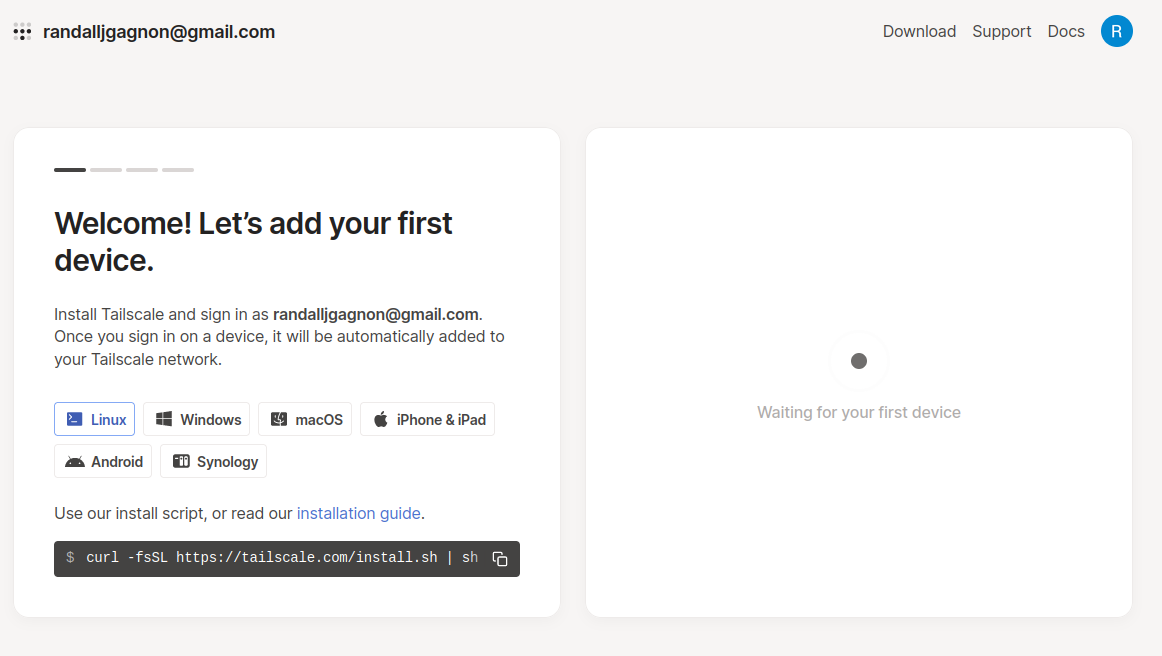
First head over to the Tailscale website and create an account. They have Google, GitHub, and Microsoft integration so creating the account is extremely fast.
The account and all devices were torn down prior to publishing this post Next, go ahead and set up all your devices based on the instructions the site provides. Linux does not have a GUI, so after you install it, you’ll need to bring the service up with
sudo tailscale up
Later we’ll enable features like an exit node and routes, but first, let’s just get all of our end devices onto the network.
Install Tailscale on pfSense
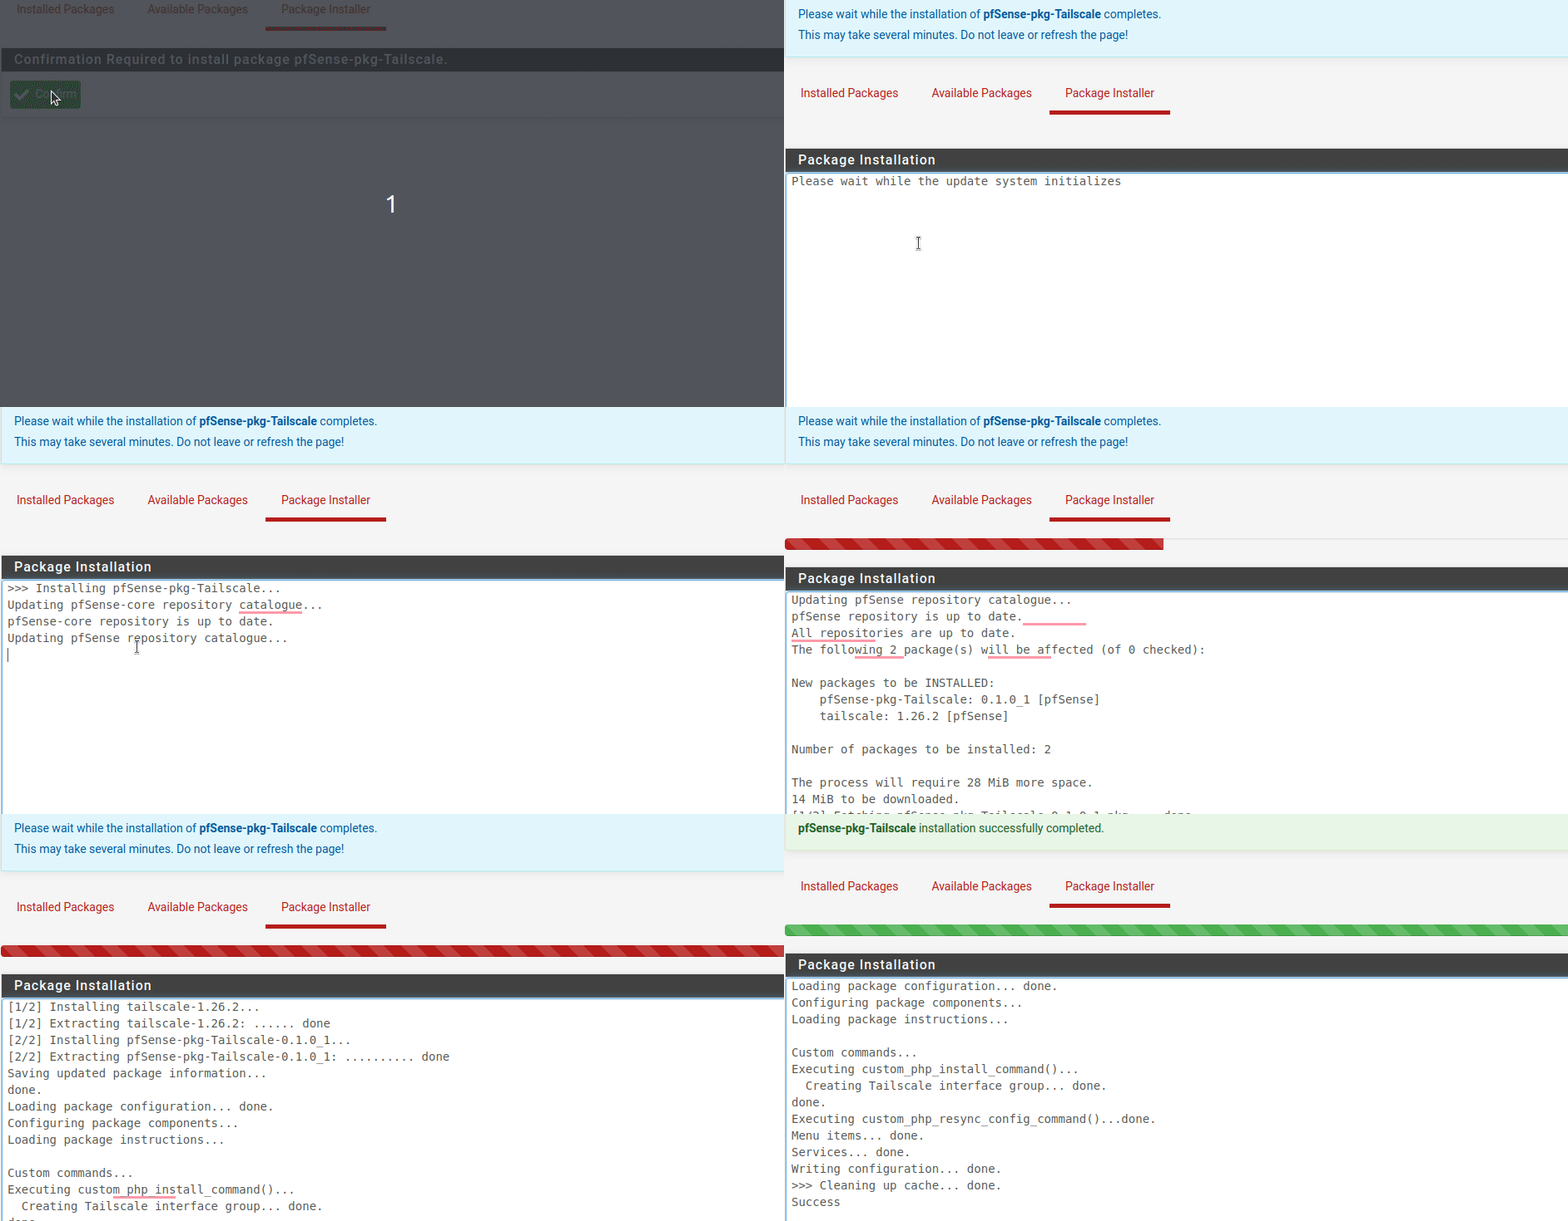
Log into your pfSense router and open the package manager to look for Tailscale in the Available Packages:
Next, install the package
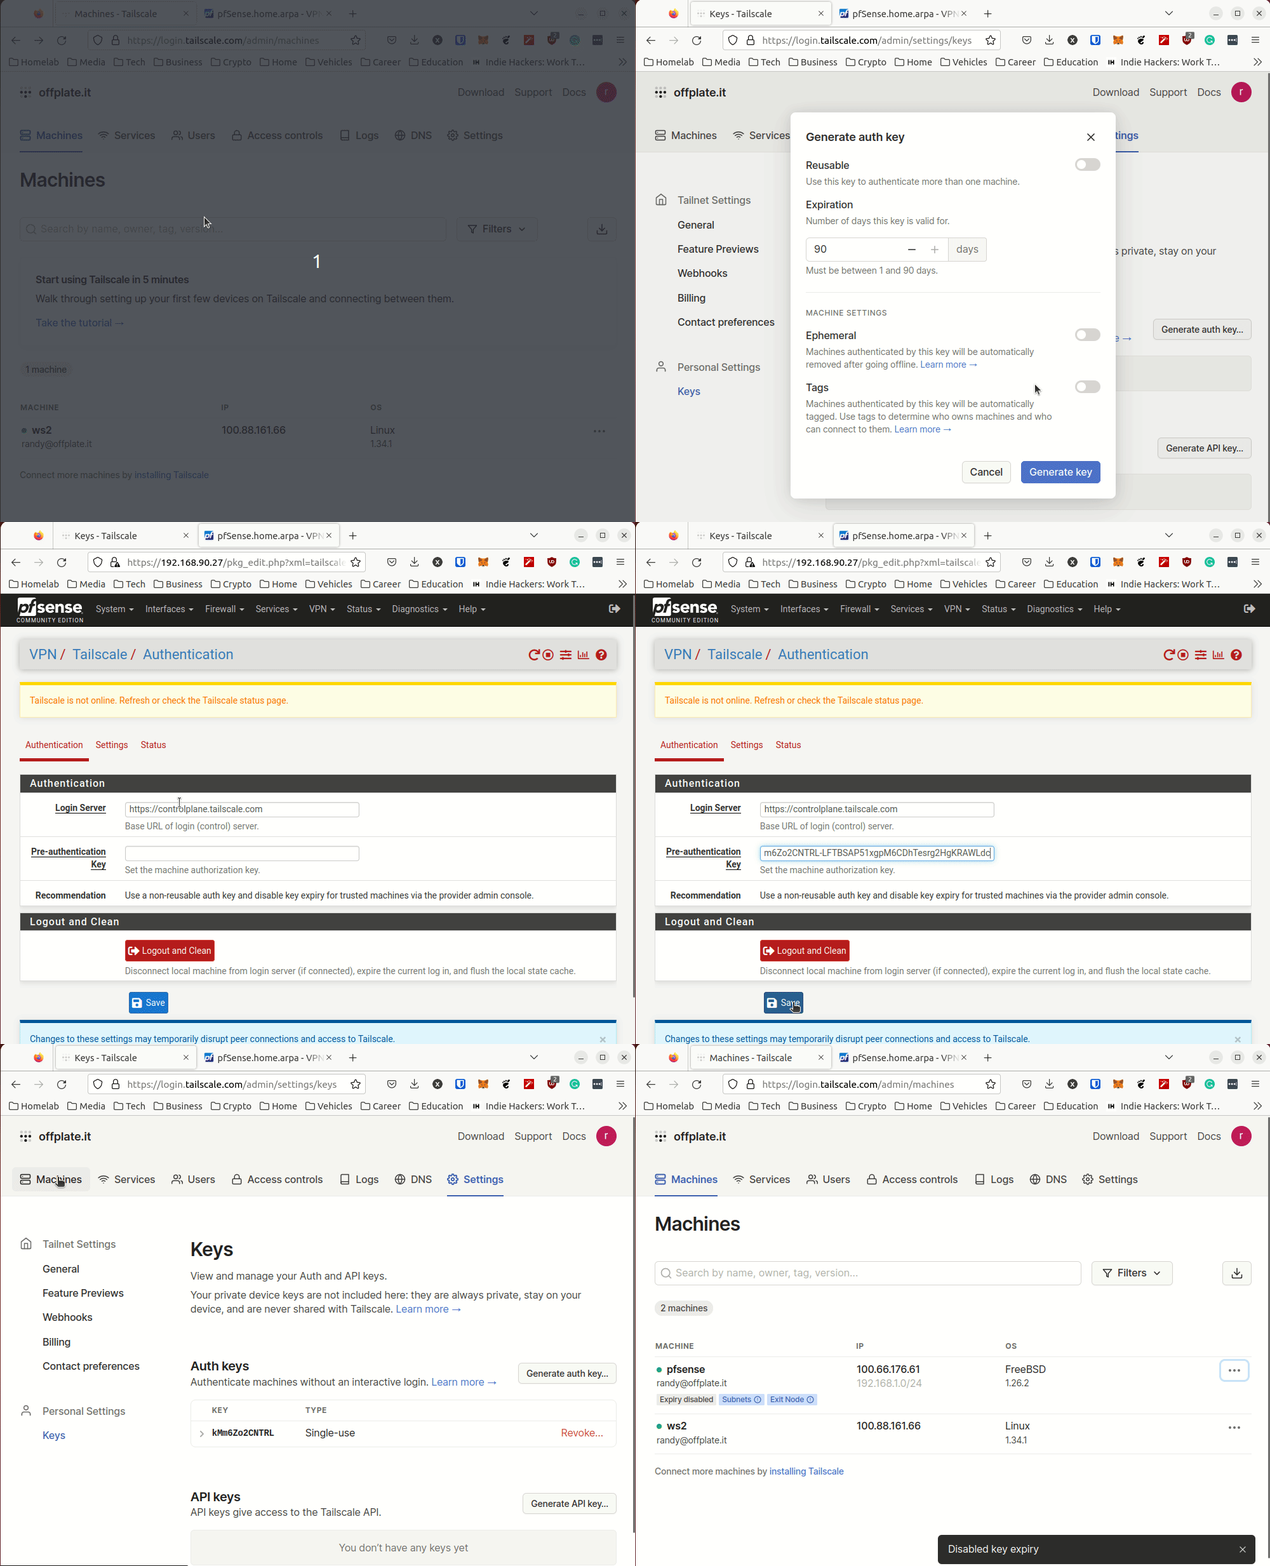
In order to authenticate with the Tailscale network, we’ll need an auth key. So go to the Tailscale dashboard, generate one, and copy it to the clipboard. Don’t worry about the days until expiration, we can disable it once it shows up on the network. Leave all the other settings default and paste the key into your pfSense router under Pre-authentication Key.
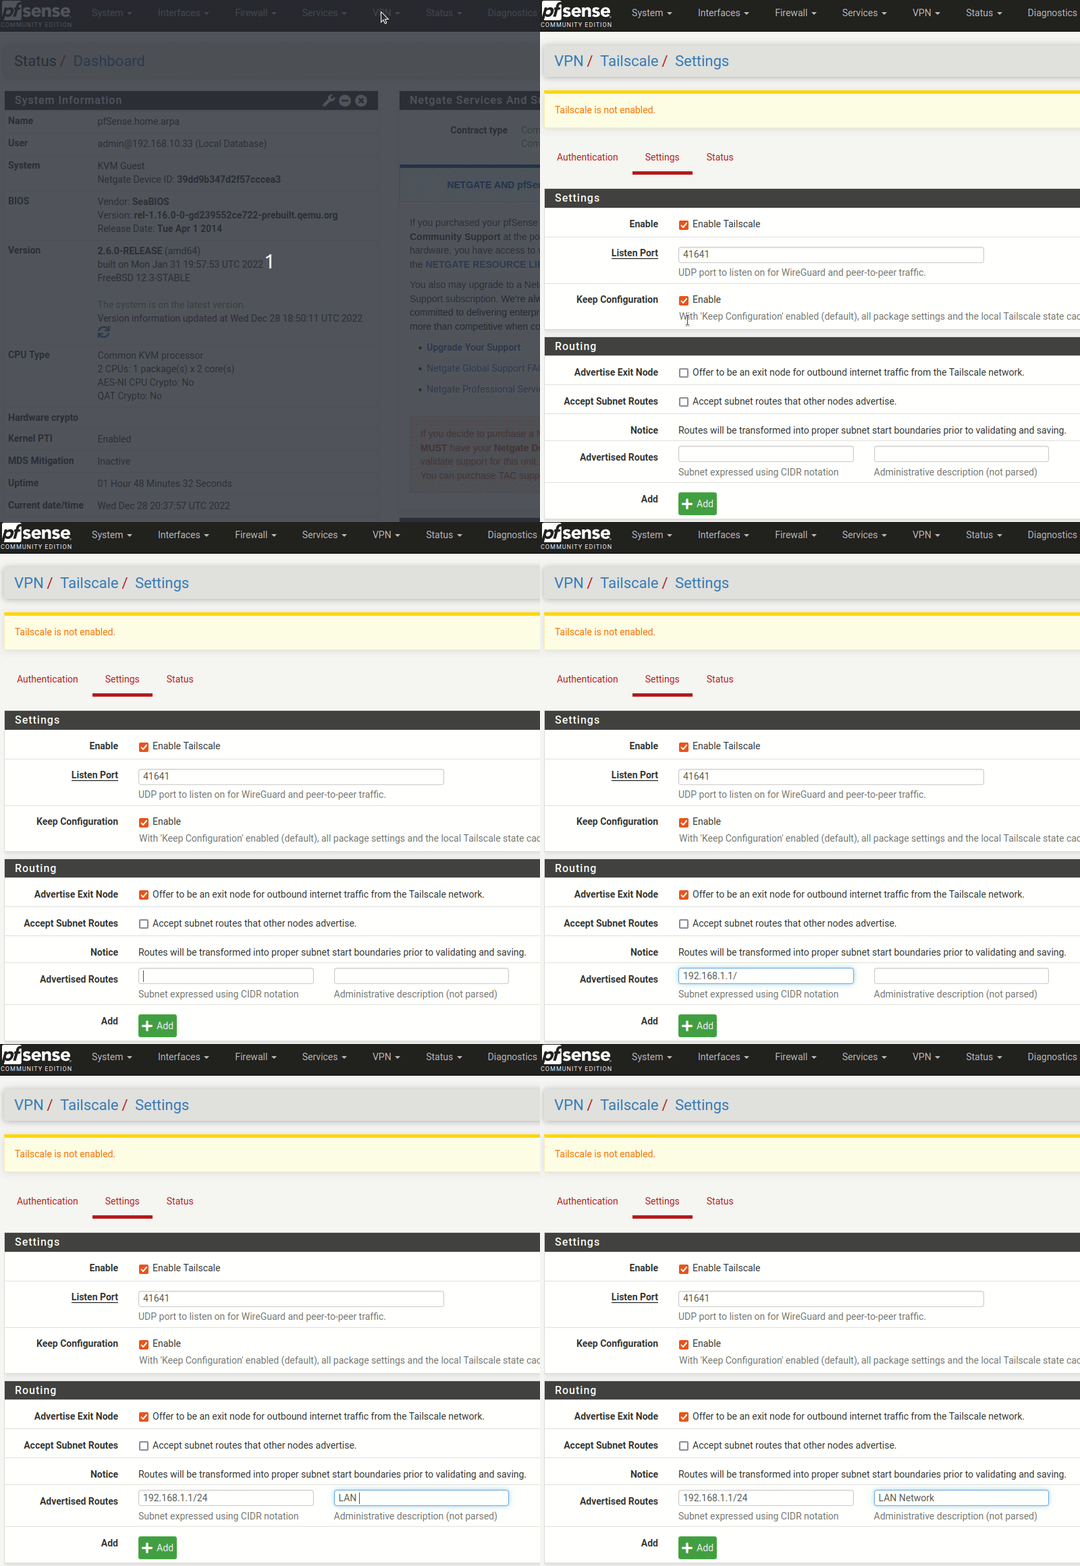
And now we can browse over to the settings so we can enable the service. While we’re at it, we can advertise our pfSense router as an exit node for all of the clients(like our phones or laptops). In addition, we want our clients to be able to talk to the devices on our home network, so we can advertise routes so they know how to get there. Here, the 192.168.1.1/24 represents a wired network that services running in the home are attached to - such as a TrueNAS server.
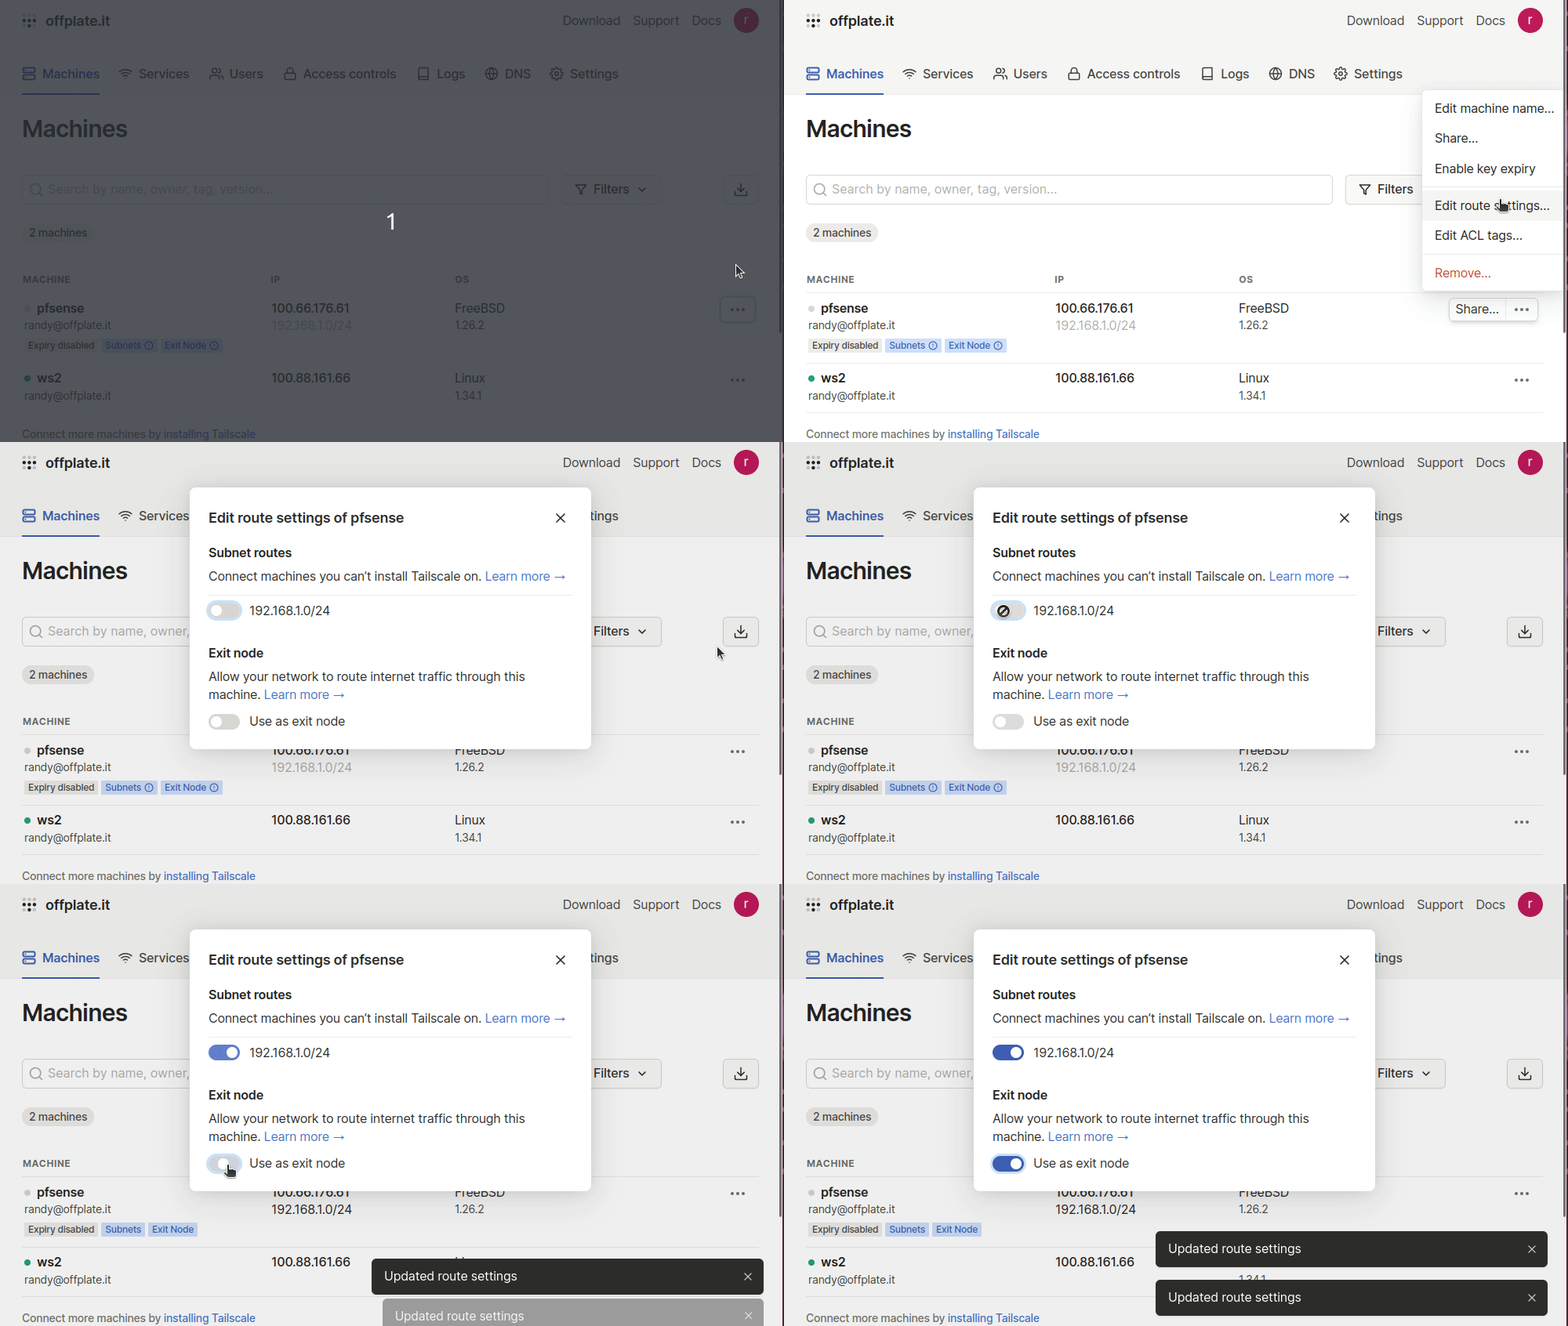
Lastly, you have to permit the pfSense router to become an exit node and share routes. This is a wonderful security feature that can prevent routing issues in the overlay.
Great! Your pfSense router is now configured to use your Tailscale VPN overlay. If this is all you needed, you’re done. However, I want to make sure it works…
Configure a Linux VM to browse to a service behind the pfSense Firewall
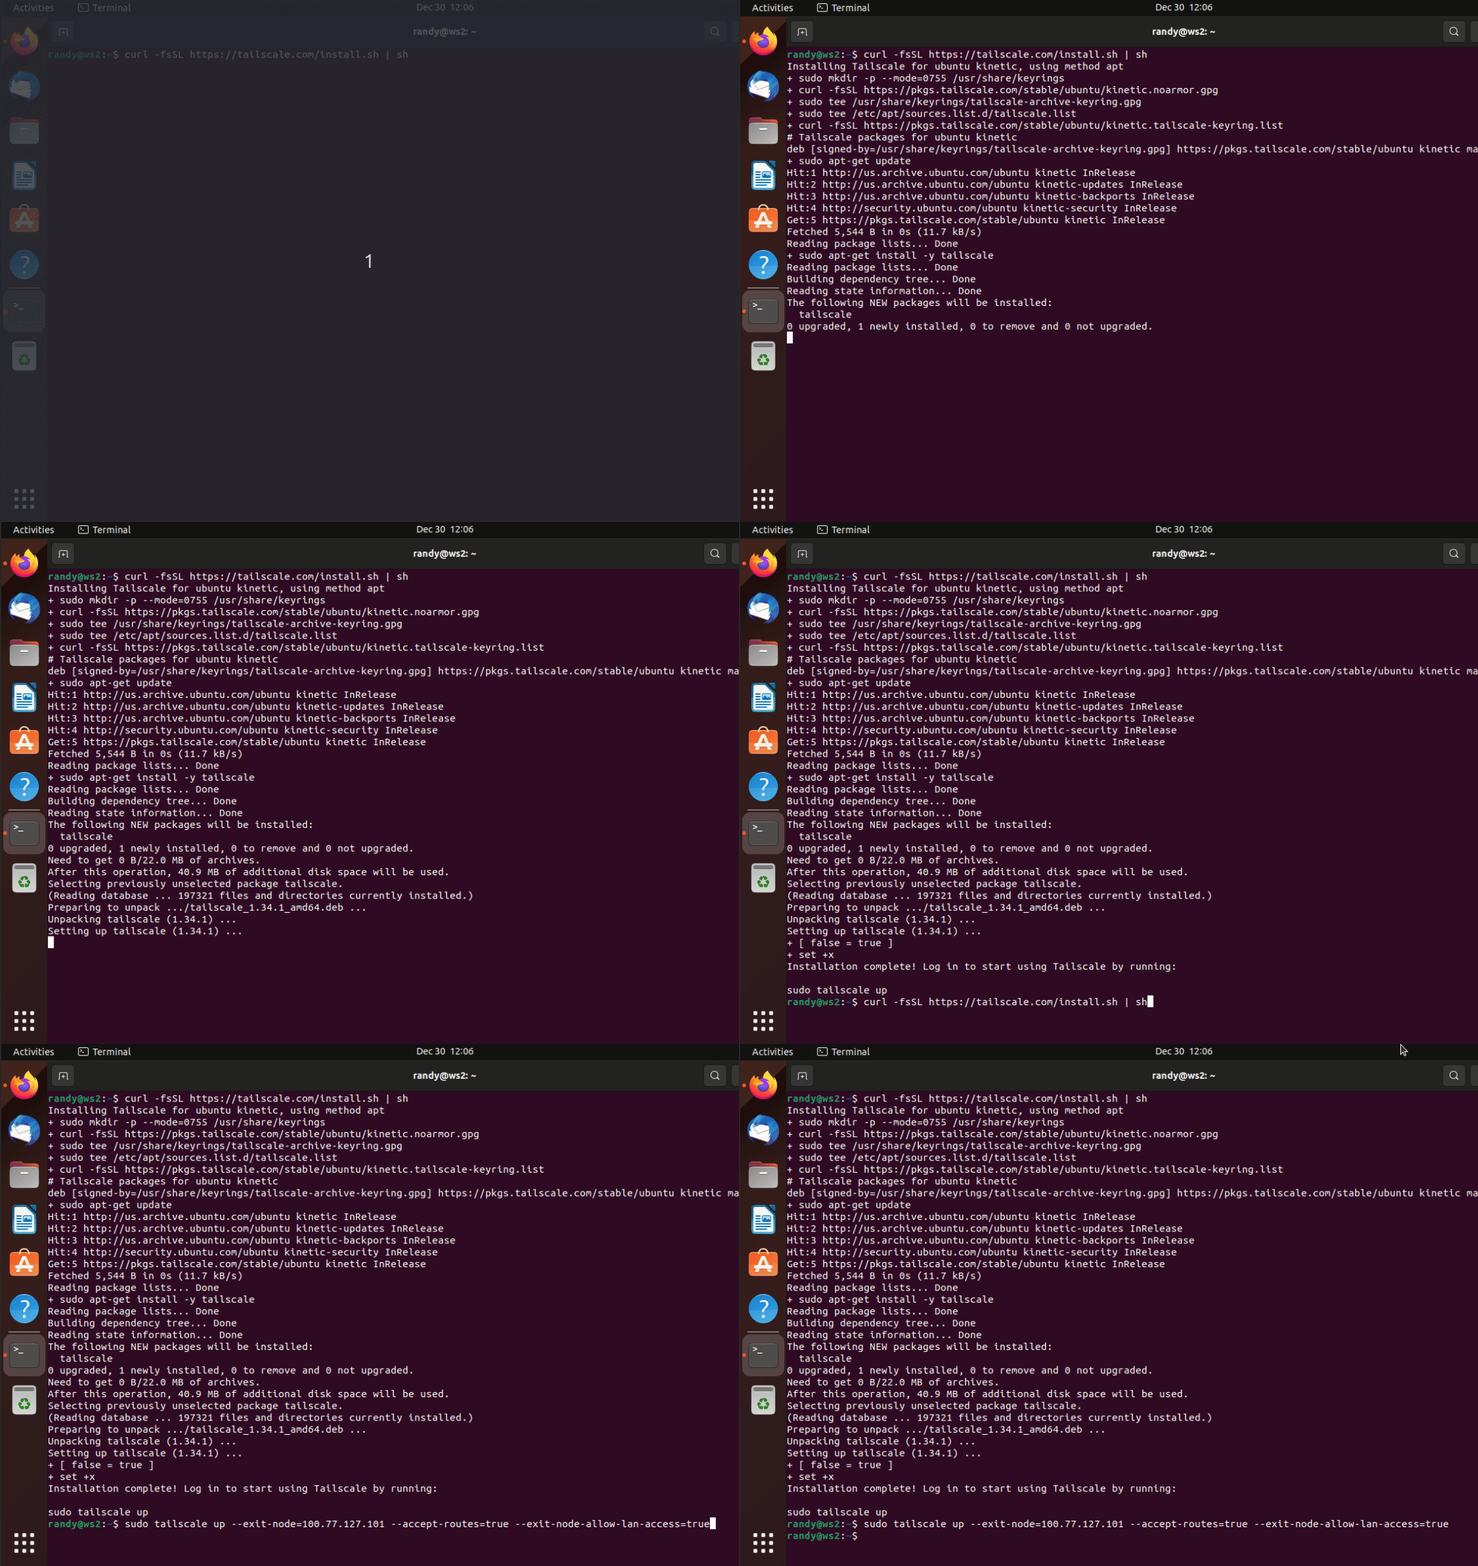
I’ll skip the VM setup to keep this short but after setting it up, go ahead and use the script Tailscale gave us to install the client
curl -fsSL https://tailscale.com/install.sh | sh
After it’s installed we can bring the service up but you’ll want to specifically point to the exit node and accept the advertised routes. So we can do that with the following:
sudo tailscale up --accept-routes --exit-node=123.231.132.123 --exit-node-allow-lan-access
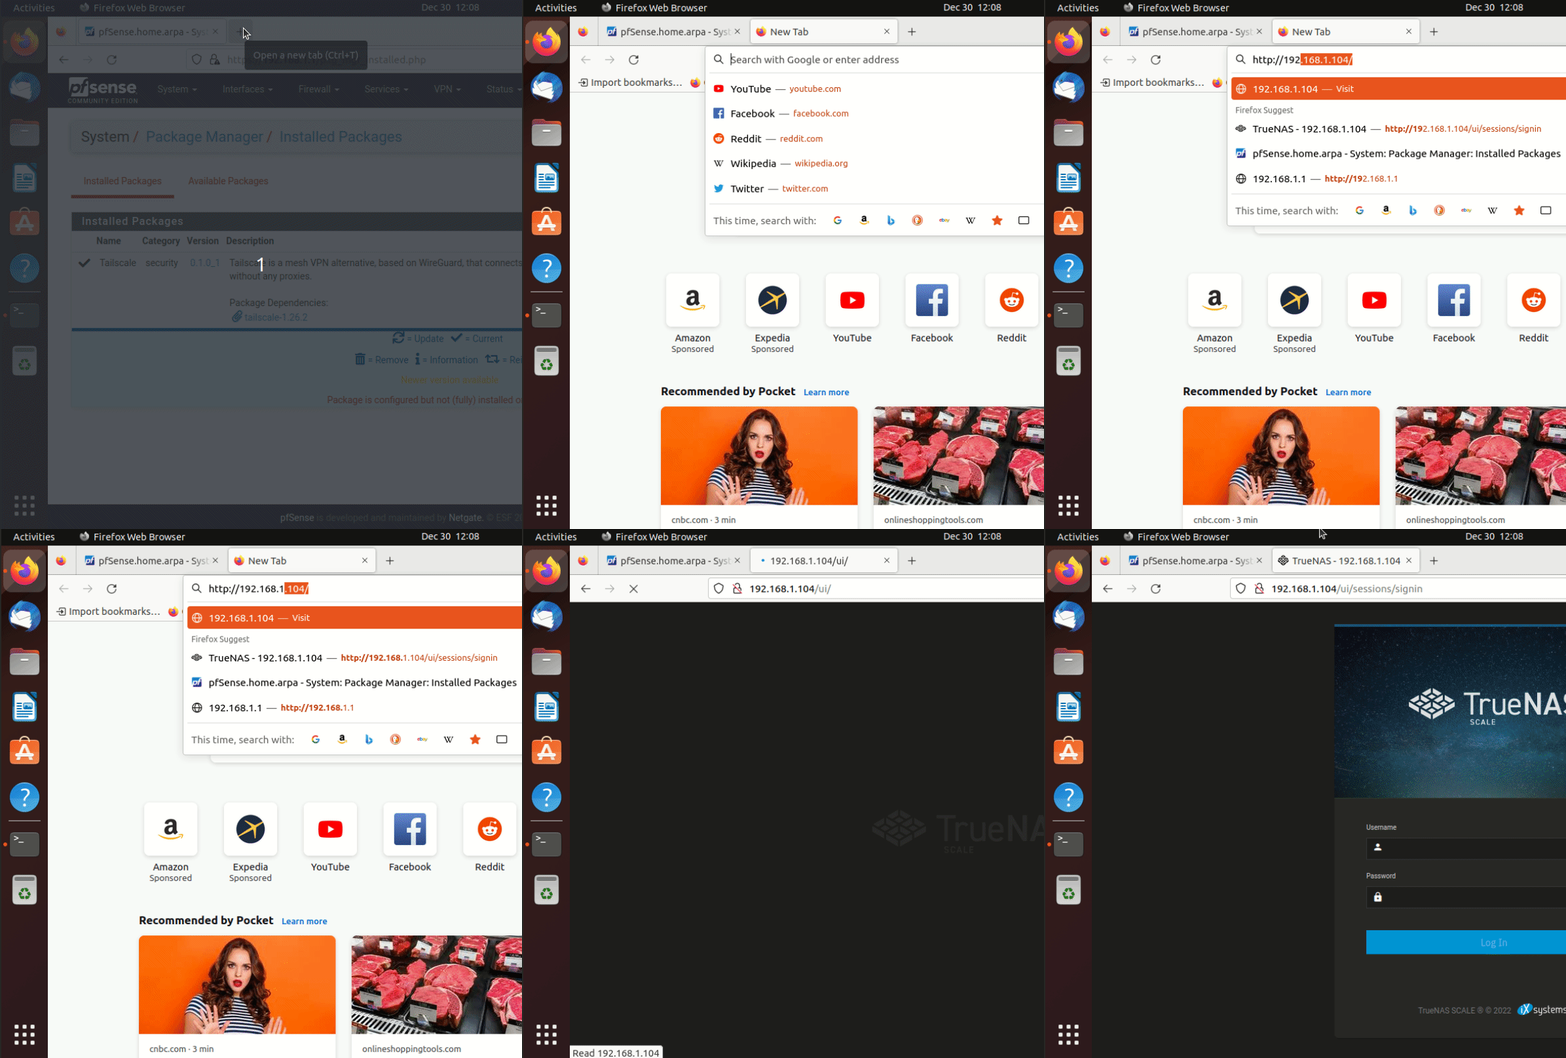
Now let’s check that we can get to a service hosted behind the pfSense router - here I’m testing a Truenas Scale server
Warning! **If you are using Firefox as your browser, “DNS over HTTPS” is enabled by default and could cause issues. If this is the case, you may get an error like **PR_END_OF_FILE_ERROR. Read up more here and here. If you get this error as well and find a way to modify the Tailscale settings to allow this to stay enabled, please let me know!
